Mission Table Assembly
Nomad Furniture Tables have a sturdy frame system to provide beauty, style, and durability. Our other tables are assembled in similar fashion.
All Nomad tables are available in American Red Oak and Hard Maple.
Nomad Furniture Tables have a sturdy frame system to provide beauty, style, and durability. Our other tables are assembled in similar fashion.
All Nomad tables are available in American Red Oak and Hard Maple.
We wanted to create a photo set of instructions for you to view to assemble your Nomad Mission Table. These are general instructions which help with any Nomad table assembly. Tools need to assemble: a Phillips screwdriver, rubber mallet or hammer with wood block included, and a pair of pliers.

Take parts out of the box. All assembly should be on a rug or carpet to prevent scratching the wood as you assemble. Identify the parts. In this picture we have from left to right: metal parts, instructions, table top (bottom), slotted crosspieces (for Mission table), and legs.
I have placed these parts on a counter (or the floor) with a rug underneath to protect the counter and the table parts from scratching.

Install four corner brackets to each of the four aprons with the 3/4″ screws. Note the two sizes of aprons, attach a long apron to a short apron.

Notice the alignment of the long and short aprons and their assembly. Attach with 3/4″ screws.

Total assembly of the four aprons with the corner brackets. (For Mission table make sure the slat holes are both positioned down correctly, see picture.)

Install pointed end of the 3-1/2″ hanger bolts in the pre-drilled holes in the legs using a pair of pliers. Take care not to ruin the fine threads of the hanger bolt.

Note how the legs look after screwing in the hanger bolts.

Connect the legs to the apron assembly.
Connect the legs to the apron assembly using one washer and nut per leg. Insert the hanger screw into the corner bracket then place washer and nut on it.
Note: Inside groove in the aprons should be at the top of the leg.
Attaching the Table Top.
Center the assembled apron and legs upside down on the table top. Use the Z-clip connectors with 5/8″ screws to attach the top to the base as shown.
For a Pecos table tighten the leg bolts and you are done.

Install 5/8″ shoulder screws in lower leg holes. Loosen hanger bolt nuts about 3 turns. Install 4 slats
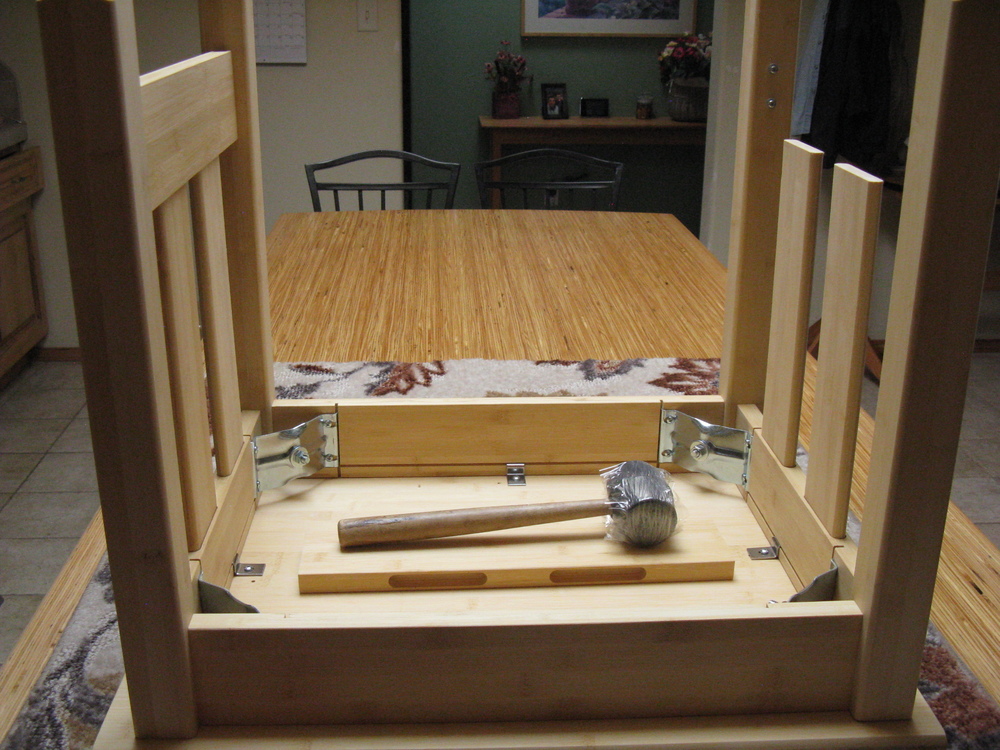
Note the left side is complete with the slats in place and the bottom crosspiece taped down snug. Make sure the shoulder screws are aligned with the slots in the crosspiece.
The right side has the slats in place and will attach the crosspiece and tap it down snug.
Now tighten the hanger bolt nuts.
Do not over tighten.

Completed assembly of the table. Good job.

Congratulate yourself for a job well done. You have finished your Mission Table.